Sunday, October 10, 2010

Mmmmmm Zucchini-Watercress Soup

One of my favorite pastimes is coming home from work and cracking open a cookbook and perusing its contents for a new and delicious recipe. This easy recipe I found while reading the Silver Palate Cookbook in its entirety during my first and second year of law school. I love soup and this recipe is particularly spectacular since the zucchini lends a sweetness and smooth consistency without adding the extra calories off heavy cream. It also is just as delicious if you make it vegetarian or vegan by omitting the butter and chicken stock. This is the sort of recipe that makes you say, Wow! It will be sure to impress you, and your most discerning guests!

Ingredients:

4 Tablespoons (1/2 stick) unsalted butter
2 cups finely chopped yellow onions
3 cups chicken stock (or vegetable stock or water if vegetarian/vegan)
2 pounds (about 4 medium size) zucchini
1 bunch of watercress
Salt and freshly ground black pepper, to taste
Fresh lemon juice, to taste

Directions:

1. Melt the butter in a large heavy pot over low heat. Add the onions, cover, and cook, stirring occasionally, until the onions are tender and lightly colored, about 25 minutes.
2. Add the stock and bring to a boil.
3. Scrub the zucchini well with a kitchen brush, trim the ends, and chop coarsely. Drop the zucchini into the stock and return it to a boil. Reduce the heat, cover, and simmer until zucchini are very tender, about 20 minutes.
4. Meanwhile, remove the leaves and tender stems from the watercress and rinse thoroughly.
5. Remove the soup from the heat, add the watercress, cover, and let stand for 5 minutes.
6. Pour the soup through a strainer, reserving the liquid, and transfer the solids to a food processor or use a food mill fitted with a medium disc. Add 1 cup of the cooking stock and process until smooth.
7. Return the pureed soup to the pot and add about 2 cups more stock (see Note), until the soup is of the desired consistency.
8. Season with salt, pepper, and lemon juice. Simmer briefly to heat through. Serve immediately.

5 to 6 portions

Note: For a richer soup, substitute 1 cup heavy cream for 1 cup of the liquid added after processing.

I have also served this soup chilled with lump crab meat. Also a delicious option which is great in the hot summer months.

Enjoy!

Reprinted with permission from Workman Publishing,
from The Silver Palate Cookbook,
copyright 2007 Julee Rosso and Sheila Lukins

http://www.workman.com/products/9780761145974/

Tuesday, September 28, 2010

Yia Yia's Yemista aka Grandma's Stuffed Peppers


Several months ago I was fortunate enough to meet the virtual acquaintance of another (and lovely) food blogger Devaki, from WeaveThousandFlavors.com. Through her blog, Devaki had a competition for a product from Emile Henry and since we all know I have a bit of a pot (not the type you smoke) addiction, I had to enter! Below is my winning submission as well as pictures of the stuffed peppers in my brand new Emile Henry Brazier, which I won courtesy of Grandma's recipe, Devaki and Emile Henry. For a direct link to her post along with a funny story about the first time I made the stuffed peppers, go to

http://www.weavethousandflavors.com/2010/06/and-the-winner-of-the-make-your-wish-emile-henry-give-away-is.html?cid=6a012875c7e993970c0134849d2b4a970c

Ingredients:

6 medium to large tomatoes (I say medium to large because some veggies have become gargantuan lately - just buy ones that are large enough to stuff, but not so large that they do not fit in the casserole dish/roaster)(buy four tomatoes you will stuff, and two that are extra ripe ones that will become the sauce)

4 medium green peppers (you can also use round or oblong summer squash)

1 cup of long grain rice

1 lb ground lean beef or turkey meat

1 small red onion chopped

2.5 Tbs chopped parsley

1.5 Tbs finely chopped mint (Note: do not use peppermint, the other kind)(you can also use dry, mint but use half the portion)

1/3 cup toasted pine nuts (optional)(this is my addition, but my Grandmother said others in Greece use them too)

2 Teaspoons sugar

¾ Cup olive oil

Kosher salt/pepper

¼ Cup white wine (optional)

Directions:

First, make sure you have a pan (perhaps an Emile Henry Brazier) that accommodates all the vegetables. Then, cut the tops off the peppers and slice or pull out the core.

Turn 4 of the tomatoes upside down and using a very sharp knife, cut a circular hole, about 2 inches in diameter, in the top of the tomato.

Carefully scoop out the inside of the tomatoes with a small spoon and reserve.

Place the tomatoes and peppers in a baking dish and in each tomato, sprinkle 1/2 tsp of sugar in the interior. This helps if the tomatoes are not super sweet.

Grate the remaining two tomatoes on the large part of a box grater. My grandmother uses this technique when making any tomato base. When feeling lazy I have also been known to pulse them in a food processor or my Vitamix. Also add the cores of the tomatoes that you previously removed and chop any pieces that seem too large, i.e. over an inch.

In a medium sauté pan, heat ¼ cup olive oil and add the onions, sauté until softened and then add the rice. Sauté for another 2-3 minutes, then add the mint, parsley, black pepper and about 1 Tbs of kosher salt. If using white wine, add a splash and stir. Then add one cup of water, bring to a boil, reduce to a simmer and cover with a lid and cook until the water is absorbed. The point is that you are only half cooking the rice because it will absorb additional moisture from the vegetables.

In a medium sauté pan brown the meat, drain any fat, salt and pepper to taste (you can also substitute vegetable or soy protein if you are vegetarian or vegan).

Toast the pine nuts in a smaller pan, stirring frequently since they burn quickly! You can use the same pan you use for the meat, just rinse the pan before you brown the meat.

When the rice is done, add the meat, pine nuts and combine thoroughly. Taste and adjust seasoning and get ready to stuff! Note, the rice will still be slightly firm at this point.

Using a small spoon evenly stuff the peppers and tomatoes. Do not overfill or push down the mixture since if you do, they will not cook properly.

Place the tops of the vegetables back on and then pour the tomato puree over them. Add about ½ cup of water evenly throughout the pan. Add a generous amount of olive oil over the vegetables and salt and pepper.

Cook for at least an hour in a 375 degree oven, basting with the juices about every 20 minutes. They will be done when they have burned a little on the tops. Turn the peppers half way through if you placed them at an angle in the pan. I also rotate the entire dish half way through cooking so they brown evenly. If they are browning too quickly and the filling and the rice is not fully cooked yet, add a little extra water and cover with aluminum foil.

Serve with warm crusty bread, feta cheese and olives. Trust me . . . they are good!!!

Kali Orexi!


Thursday, August 12, 2010

Yummy Fruit Popsicles!!!


The irony of this post is that although I planned on writing it some time last week, the heat in New York has made me lazy and tired, which kept me in a vegetative state in between my air conditioner and circulating fan. I think I now fully understand what they mean when they say, "the dog days of summer." For the past two months I have had daily fantasies of moving to some tropical island so that I can roam around in a bikini with a frozen cocktail permanently affixed to my hand. In the meantime I will continue to appease myself with frozen treats like the popsicle pictured above.

Watermelon Raspberry Popsicles

3 cups cubed watermelon
1/2 cup raspberries
squeeze of 1/2 lime
1/3 cup simple syrup (more or less to taste)

Blend all of the above ingredients and add to popsicles forms and freeze until firm. To make the simple syrup, add equal parts of sugar and water and melt slowly over a medium flame until the sugar granules have disappeared. You can make a batch of the syrup in advance and store to sweeten coffee, tea, cocktails or fruit salad.

You may want to give these watermelon popsicles a stir mid-way through freezing, otherwise the mixture will separate. They still tasted great so it is purely for aesthetic reasons.

Orange Mango Popsicles

orange juice (use your popsicle molds to measure out the right amount)
1 small ripe mango
15-20 raspberries

For this recipe I simply used my popsicle molds to measure out enough orange juice. Keep in mind that you will need to leave extra room for the mango and raspberries.

Combine one cubed mango to the orange juice and blend. Add the puree to the molds and dropped in a few raspberries for decor and flavor. Because I used Tropicana (which is already sweet) I did not add extra sugar. I would imagine this would taste even better with freshly squeezed oj.

Note: As with all popsicles, leave about 1/2 inch at the top to allow for expansion of the liquid when it freezes. If you don't have popsicle molds try ice cub trays with tooth pics! Just remember to add the tooth pics after the mixture has frozen a bit.

Although I don't have kids yet, I imagine this would be a good way to get some extra fruit in their diets. For adults kids you can chill the puree and add some rum or vodka! Yum!

Hope these recipes help you get through the last weeks of summer and inspire you to come up your own fun flavor combinations. Next on my list are melon-basil, coconut-strawberry and kiwi-lime!

Sunday, July 25, 2010

Fresh Fettuccini with Fresh Tomato Basil Sauce


July in New York was officially categorized as the hottest on record. There has been absolutely no break and although you might think that I have no right to complain when some States are seeing temperatures in the 100s, you need to have lived in New York during the summer to understand what I am going through. I love my City and will rarely have anything bad to say, but the humidity is horrible, the air quality oppressive, and if you think its bad above ground try taking the subway. I lived in Greece when temperatures were in the high 120s, and I can assure you this is worse.

Despite the heat, Saturday was the New Amsterdam Market and if you read my last post you probably already know that nothing would have kept me away. As it turned out I also was going to be hosting an impromptu dinner party so I needed inspiration and ingredients. Although ice cream was a given, I still was trying to make up my mind regarding an entrée. My first thought was fresh pasta with a meat sauce, but that seemed heavy and got nixed quickly. For a moment I thought about a quiche, but I had visions of melting pastry dough and an oven not being able to keep up with my AC. After some time, it finally came to me! I was going to make fresh fettuccini with a fresh tomato basil sauce. Its refreshing, light and requires limited prep and minimal clean up.

Although this sauce can be made with any tomatoes, I love using small heirloom tomatoes of various colors since it adds to the presentation.

Fresh oregano can be used instead of dry, but it was hot and I was tired so I decided to make due with what was in my pantry. This dish is delicious with fresh pasta, but I imagine it would be as good with any dry pasta, like fusilli or penne.

Fresh Fettuccini with Fresh Tomato Basil Sauce

- 2 pints cherry, grape tomatoes halved or quartered

- 10 basil leaves rolled and thinly sliced

- 2-4 garlic cloves crushed (depending on their size and how much you like garlic)

- 1 teaspoon dried oregano

- 1 teaspoon chili flakes (or more if you like heat)

- ½ cup olive oil

- kosher salt and freshly ground black pepper to taste

Combine all the ingredients in a non-reactive bowl and allow to sit at room temperature for 2-3 hours.


Toss with cooked pasta and serve with freshly grated parmesan.

Stay cool! Next post, ice pops!

Wednesday, July 21, 2010

Next New Amsterdam Market-July 24, 2010!


Mmmmm, tarts....

On June 1, 2010 I wrote about the City of Merchants which was a fundraiser which benefited the New Amsterdam Market. Anyone that knows me knows how much I LUV this market since it supports and showcases local food artisans, farmers and producers. On the most basic level, the people at the New Amsterdam Market are trying to get enough interest so that they can take over the old abandoned Fulton Fish Market and host an indoor, year long market. Think Reading Terminal in Philadelphia. The food is fresh, delicious and reasonable. Samples are plentiful and you will always find something new! To wet your appetite I have posted some pictures from this and last year. The next one is on July 24, 2010 at Peck Slip by the Seaport and in my humble opinion, if you like food, eating or cooking, you must attend!


Fresh Pasta!


Cheese!


Porchetta!


Beautiful Maple Syrup!


Chocolate!


Artisinal Breads


Bagels


Fruits

Veggies


Last but not least...dessert from the Bent Spoon!
Rhubard/Shiso and Mango/Blueberry Sorbet


For further details got to http://www.newamsterdammarket.org/

Sunday, July 18, 2010

Jazzed-Up Insalata Tricolore


I realize this is my second salad post in a row, but it is hot as hades in New York and frankly light summer food is the only thing I can think about making or eating. This salad is a variation of the Insalata Di Foccacia that I used to eat at I Tre Merli, an Italian restaurant I worked at for several years. Last year I was craving the salad and tried to recreate it to only find out that I liked my version more (Sorry Paolo). What I think I did was merge the Insalata Tricolore with the Insalata Di Foccacia.

For extra protein/flavor you can add shaved parmesan or halved boccini mozzarella. As is, this salad is vegan, vegetarian and hearty enough to be sufficient as lunch or a light dinner. If you are feeling fancy you can even make your own foccacia croutons, although I find the store bought Italian seasoned croutons good enough. I douse my salad with balsamic vinegar, but since I realize not everyone may like vinegar as much as I do, I have modified the dressing so that you don’t end up with a permanent pucker.

Ingredients:

1 package of pre-washed baby arugula or 3 cups of baby arugula washed, rinsed and dried

2 endives halved and sliced into ½ inch pieces

1 small radicchio sliced into one inch pieces

2 ripe tomatoes cut into one inch pieces

6-8 large basil leaves, stacked, rolled and thinly sliced

1 cup Italian croutons or Foccacia croutons

½ cup toasted pignoli nuts a.ka. pine nuts (see note and picture below)

2 Tbs capers (more if you love capers like I do)

3 Tbs good quality balsamic vinegar

1/3 cup olive oil

Kosher salt and fresh black pepper to taste (go easy on the salt and add more if needed later. Capers are pretty briny).

Directions:

Toss everything into a large bowl, add the dressing and mix thoroughly. Taste and adjust the seasoning as needed.

The nice thing about this salad is that the arugula, radicchio and endive stand up to the dressing and it won't get soggy as quickly as other salads. What I really like is when the croutons get soaked in the balsamic. Sometimes I just pick at the balsamic doused croutons and leave the rest for my husband. Yum!

Note: Toast the pine nuts lightly over medium heat in a small frying or saute pan until they have reached the color below. No oil is needed and make sure they do not burn! Check ethnic stores for pine nuts since they tend to be cheaper than the ones you find at gourmet shops.

I hope you enjoy this salad as much as I do.


Buon Appetito!

Sunday, July 11, 2010

Kat's Summer Orzo Salad


I am back! Although my blog is new, I unfortunately had to take a mini blogging vacation. The reason for my cooking/writing sabbatical will be revealed shortly and hopefully my next few recipes will make up for my time away. My original plan for my next post was my friend Ifrain’s tostones recipe, but because I made this orzo salad for a 4th of July party, I figured this recipe should come first. It is a great summer dish and tastes even better on the beach! This recipe is a modification of a salad I used to buy at Wild Oats in Miami Beach and over the years I have changed the recipe to create a perfect balance of orzo, feta, olives and tomatoes.

As further proof of this recipe’s success, I have posted a picture below of my friend’s beautiful daughter finishing up her second portion of the salad. This was the truest compliment since her mother says she is a picky eater and at 14 months she is too young to know how to lie. To me this is as good as a four star review from the Times!

Ingredients:

1 package of orzo (or about two cups uncooked orzo)

1 pint of grape tomatoes halved or quartered (sometimes I don't have enough tomatoes to I quarter them so they go further)

1 cup of pitted Kalamatas chopped

3/4 lb of Feta, crumbled

6-8 thinly sliced basil leaves

2 thinly sliced scallions

2 Tbs olive oil plus extra for the orzo

3 Tbs red wine vinegar

2 cloves crushed garlic or finely mince and create a paste using the flat of your knife and a little salt

salt and freshly ground black pepper

Directions:

Cook the orzo according to the package instructions in rapidly boiling salted water until al dente. (Make sure it is not overcooked or it will be mushy). Stir frequently to ensure the orzo does not clump. When done rinse in cold water and top immediately with olive oil and mix to ensure the orzo does not stick together. Normally I don’t rinse pasta, but in this instance it is ok since it will be served cold and you don’t need the extra starch to bind a sauce.

When the orzo has cooled add the Feta, Kalamatas, tomatoes, scallions and basil leaves.

Make a vinegraitte by combining the vinegar, olive oil and garlic. Combine well and toss over the salad and then stir to incorporate. Add salt and pepper to taste. I usually add one teaspoon of salt and black pepper, but the season will vary depending on the Feta you use. Some brands are saltier than other. Make sure the salad is thoroughly mixed, then chill over night or at least a few hours. This salad tastes best the next day!

Notes:

§ Chiffonade the basil leaves by stacking, then rolling tight and slicing. I usually give them an extra chop so the pieces are smaller.

§ You can usually find pitted Kalamatas, but if not, you can use a cherry pitter to remove the pits. You also can use the flat side of your knife, by smashing the olive as you would a garlic clove. The pit will be pushed away from the flesh of the olive. Remove the pit and immediately throw it away. Even if you use pitted Kalamatas make sure there are no pits hiding since you don’t want anyone to chip a tooth while enjoying this salad.

§ As with all recipes, this salad required the best quality Feta, Kalamatas and olive oil.

I hope you enjoy this salad as much as Nairee did!!

Kat

Saturday, June 12, 2010

A Brazilian Feast!


Several weeks ago I decided to host a Brazilian send-off for two new friends that were going to Sao Paolo. On the menu was bolinhos de bacalhau, marinated pork loin, sautéed collard greens, rice, beans, and of course caipirinhas. When I first was introduced to Brazilian food the first dish that I first fell in love with was the bolinhos de bacalhau, or codfish fritters. Over the years I have developed my own little ritual for eating them, which includes a squeeze of lime, a dash of Tabasco and a spoonful of Brazilian vinaigrette (recipe below). This is not the traditional way to eat them, but like many of my food compulsions, once I find a flavor combination that I like, long standing tradition goes out the window.

These still are quite possibly one of my favorite things to eat and at dinner parties they fly off the table. The ingredients are cheap, the flavor wonderful and they can either be served as an appetizer or as part of the main meal. Malaguetta pepper hot sauce is always present and capirinhas are consumed faster than my husband can make them. The recipes for the foregoing are all below and I hope you will try one, if not all, of the dishes featured. Although I am not Brazilian, my husband is, so with his nod of approval I can guarantee that this food is authentic and delicious!


Bolinhos de Bacalhau:

1 lb of salt cod soaked for 2 days. Change the water several times. (Some recipes call for a longer period of time but I feel that this removes too much salt.)

2 large potatoes (you will need two cups)(white, Yukon or any type that mash well)

2 Tbs finely chopped parsley

1 cup of bread crumbs

several dashes of garlic powder

2 eggs separated with the yolks lightly beaten

¼ cup milk (optional)

1 bay leaf

1 Tbs of peppercorns

½ yellow onion sliced

salt to taste

1 quart of vegetable oil for frying

Newspaper and/pr paper towel for draining

Hot sauce

4 limes quartered

(Note: You can find salt codfish at Whole Foods, but it is a lot cheaper if you go to a store in Chinatown or in Italian, Portuguese, Spanish or South American neighborhoods.)

Add the codfish, bay leaf, peppercorns and the onion with enough water to cover and simmer for 5 minutes. Remove from the heat. (I have read that if you overcook the fish will toughen but I never saw a difference when I forgot the codfish too long)(You can also store the fish in the mixture for more flavor).

Peel and cube the potatoes and boil in salted water until they are soft enough to mash.

Drain the codfish and place in a food processor. As I add the codfish I go through it and remove any bones or pieces of skin. Pulse the fish until it is in tiny bits. (You can also shred by hand if you do not have a food processor.) Add the parsley and garlic powder and continue to pulse until everything is incorporated. Place the mixture into a large bowl and using a potato ricer add the potato. If you do not have a ricer, mash finely using a fork. I add a little potato at a time checking for flavor as I go. Add salt, mix thoroughly and taste for seasoning.

Add the egg yolks and incorporate. If the mixture is too dry add some milk to moisten, if too wet, bread crumbs to absorb the moisture. Take the remaining egg whites and beat until soft peaks form and then fold into the mixture. This extra step is not necessary, but I feel that it creates a fluffier bolinho. Chill for several hours until the mixture firms up.

When ready to cook take an ice cream scoop or two spoons and create evenly portioned little croquettes. You can make then round, oblong, or quenelles. Gently coat in bread crumbs and set aside until ready to fry. You can even do this the morning of, but remember to refrigerate!

In a heavy bottomed deep pan, preferably cast iron, fry at 375 degrees until golden brown. (If you do not have a thermometer, you can use my grandmother's technique, which is adding a little piece of bread to the oil to see if its hot enough. If it is ready, the bread will rise and start to have little bubbles around it.

Remember not to overcrowd the pan or they will not cook properly. The temperature will also drop when you add the food so you need to regulate accordingly. Turn the fritters while cooking to ensure even color. Drain on paper towels and salt while hot. Serve with limes, hot sauce and vinegraitte.


Vinaigrette:

1 small tomato cored, seeded and finely chopped

1 small yellow onion finely chopped

½ green pepper finely chopped

3 Tbs olive oil

Enough red wine vinegar to cover the mixture by ½ inch. About 1 cup.

Salt to taste

(Note: This is great over rice and beans or steak!)


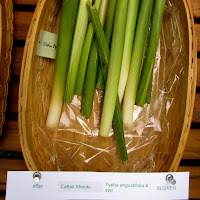
Sauteed Collar Greens:

1 bunch of collar greens washed and cored. I take the tough vein out with a knife but you can also fold the leaf in half and rip it out.

4-6 cloves finely minced garlic

Olive Oil

Salt

Layer the greens so the largest one is on the outside and roll tightly. Fasten with rubber bands or hold firmly with your hand. Finely slice as in the picture below. Many Brazilians pride themselves on how thin they can slice them. My husband’s father is particularly good at this.

Add the garlic to the oil and start to heat. Cook garlic for a minute or two, making sure not to burn it. Add the greens, tossing while cooking, so the garlic is incorporated. Cook until tender. They should still be bright green (see below). Salt to taste.

(Note: These are a nutritious and delicious side that go well with everything from fish, meat or just rice and beans. Make sure your pan is large enough. The greens will reduce quickly, but they will take a lot of room in the beginning.)

The pork loin was delicious! The recipe was created by Devaki at Weave a Thousand Flavors and you can find her recipe at: http://www.weavethousandflavors.com/2010/02/a-spin-on-brazillian-feijoada-pork-tenderloin-marinated-in-feijioda-inspired-spices-roasted-with-a-o.html

I only had time to marinate the pork for two days, but it was still great and the glaze was amazing. I like my pork medium, so I cooked it at 425 – until it reached 138 on an internal thermometer and then let it rest for 10 minutes before serving. Around 45-50 minutes. I served it on a platter surrounded by the collard greens and sliced oranges.


Caipirinha:

4 ounces cachaca (I like them strong)

1 tablespoon sugar

1 lime quartered and sliced

Muddle the lime and sugar very well. The longer you take doing this, the better it will taste. (The best caipirnha I ever had even removed the skin of the lime but this takes a bit longer. Try it if you have time). Add the cachaca, ice and shake.

You can also add strawberries, mango or passionfruit! Strawberry is my favorite!

Passion Fruit Caipirinha

Bom Apetite!

Tuesday, June 1, 2010

The New Amsterdam Market/City of Merchants


So my post on profiteroles has gotten significant airtime and now it is time to upload another review. This post was originally supposed to go up last week, but unfortunately life and reality television got in the way. I hope you will still continue to follow my blog after I admit that I am a die hard follower of the NY and NJ Housewives sagas.

Despite my weakness for trashy television, I always demand quality food and it was at the City of Merchants, which I attend on Sunday, May 18, 2010, that I was able to get a tummy's worth of delectable treats. The City of Merchants was a fundraiser for the New Amsterdam Market and despite my recent tight budget, this was one dining experience I was not going to miss! Particularly since the ticket paid for itself in food, beer, wine and dessert!

Last year I discovered the New Amsterdam Market and immediately fell in love. Ironically the Market was only several blocks from my apartment and I never knew about it until I read a post on Grub Street (another new favorite of mine). Ever since the Fish Market left Fulton Street, the area has been left unused and the founders of the New Amsterdam Market are now attempting to bring back a year long market of local purveyors and food artisans. In their own words, the New Amsterdam Market is,

"To be comprised of retail and wholesale vendors including butchers, grocers, mongers, farmers and provisioners, bakers and distributors, brokers, importers, and sellers of cooked foods, New Amsterdam Market will follow a local tradition, set by the market halls of old New York." www.newamsterdammarket.org

For those local to New York, this post may be the first notification you receive about the New Amsterdam Market and I hope you will attend. For those who do not live regionally, I hope this post will inspire you to source locally and perhaps get creative with some of the ingredients featured below.


ICED TISANES!


Refreshing iced chamomile and mint Tisanes by McEnroe Farm of Duchess County, New York.


HOUSE-CURED HAM AND CHEESE!


House-cured ham and cheese sandwiches with, what I am guessing to be, an amazing butter/tarragon spread, by Brooklyn's Marlow and Daughters. These mini sandwiches were so good I had three and even used my last ticket to get one, thereby forfeiting ice my right to cream. Fortunately my friend Lineka gave me a spoonful of her's!


GRILLED KIMCHI-CHESSE SANDWICHES!


Above are kimchi grilled cheese sandwiches by Mother-In-Law's Kimchi and Saxelby Cheesemongers. Although I did not get the recipe, I would imagine the kimchi would be good with a mild cheddar or any other mild cheese. Delicious and perfect with beer!!


FRIED FISH!


When I was a little girl I refused to eat fish. My Greek Grandfather, Efstratios, would insist that I eat all sorts of fish, head to tail, explaining that it would make my brain grown. Not sure how large my brain is, but my stomach has grown plenty and now one of my favorite foods is baby fried fish. (If you ever having a craving like I do for baby fried fish, the ones at Uncle Nick's on 9th Avenue and 51st are really good.)


ICE CREAM!

This ice cream came all the way from Vermont (I think) and it was great! I had a craving for strawberry ice cream and this definitely hit the spot. As you already read, I ran out of tickets and could not get my own, but fortunately Lineka was gracious enough to give me a spoonful of her's. I am a salt freak and she has a sweet tooth, so the friendship works well.


EDIBLE BOTANICALS!

Earlier in the morning on the day of the event there was to be a sale of wild, edible botanicals. Unfortunately they were unable to forage enough to sell, but we were allowed to sample. Who knew you could eat cattails! (Cattails shown on the left.) After sampling some amaranth and water mint, which really cleared by sinuses, I did a bit of foraging of my own and was able to find wild strawberries, dandelion greens, a mulberry bush and an apricot tree! The funny thing about New York City is that you never know what you may find, from strawberries to crack dens, we have it all!

As the date approaches I will do another post/reminder on the New Amsterdam Market with photos from last year. The first one this year is on June 27, 2010 and it will be located at 100 Peck Slip, in lower Manhattan. They are usually on Sunday and are monthly. For more information and the schedule go to www.newamsterdammarket.org.


Happy Eating!